Introduction:
Hey there, fellow YouTube enthusiast! Have you ever found yourself scrolling through your favorite videos, only to notice that some of them look like they’re lit up like a Christmas tree while others feel more like your old-school TV from the ‘90s? What’s the deal with that? Enter HDR, or High Dynamic Range—it’s like the fancy filter that makes some videos pop with vibrant colors and rich contrast. But let’s be real, sometimes it’s just too much for our eyes to handle, or maybe your device isn’t quite up to the task. No worries! In this article, we’re diving into the nitty-gritty of mastering YouTube and showing you how to switch off HDR like a pro. Whether you’re looking to save battery life or just prefer a simpler visual experience, we’ve got you covered. So, grab a snack, kick back, and let’s roll through the steps to customize your YouTube experience just the way you like it!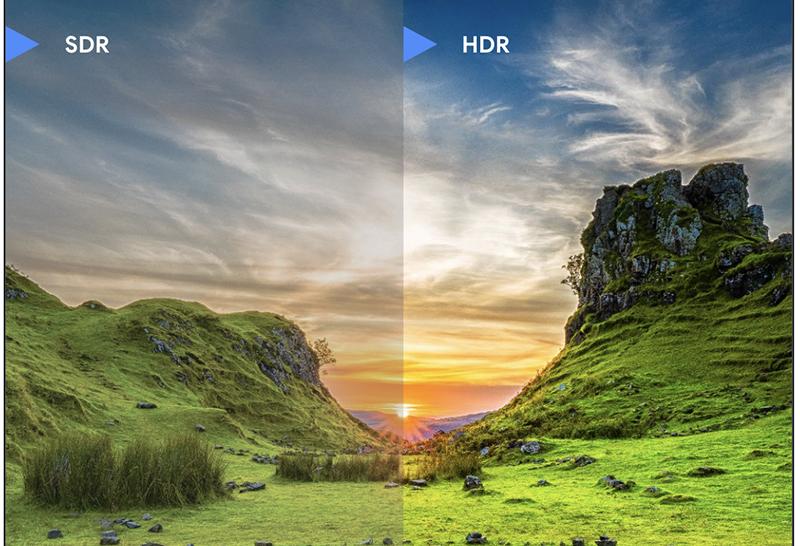
Understanding HDR and Its Impact on Your Viewing Experience
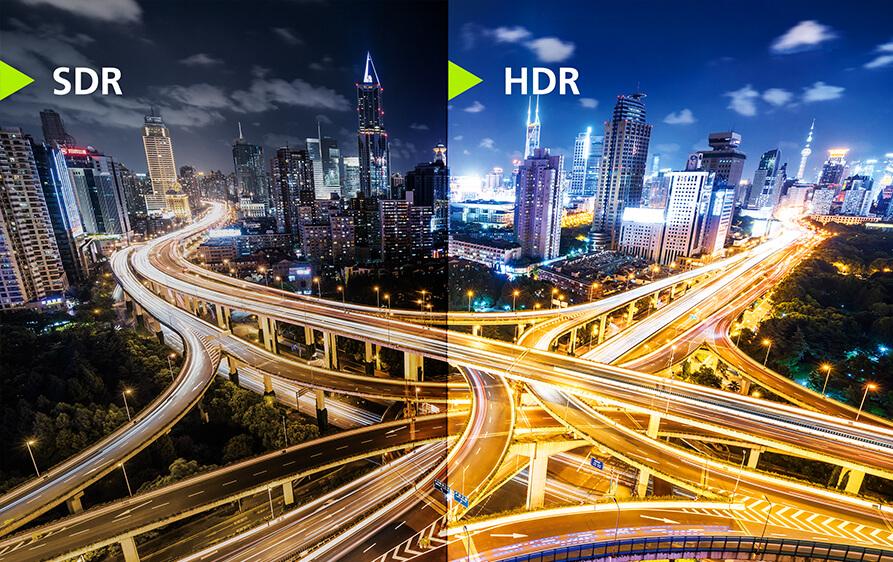
High Dynamic Range (HDR) is like that secret ingredient that can elevate your viewing experience from okay to absolutely stunning. Imagine watching your favorite movie with colors so vibrant they practically leap off the screen, and shadows so deep you can almost reach out and touch them. It brings out details in scenes that you might have missed otherwise, transforming dimly lit corners into mesmerizing displays filled with texture. But, let’s be honest, not everyone is a fan of the intense visual flair that HDR offers; sometimes, it feels a bit overdone or simply doesn’t match your mood or the content you’re watching.
Turning HDR off can sometimes feel like flipping a switch back to simpler times—think of it as trading a spicy salsa for a classic ranch dressing. You can regain control over your viewing experience, allowing for a more traditional cinematic feel. Depending on your display settings, you might notice that the image becomes softer and more relaxed, making those lighter scenes easier on the eyes. Here’s a quick checklist to ponder when considering if HDR really suits you:
- Content Compatibility: Is the video optimized for HDR?
- Personal Preference: Do vivid colors enhance or distract from your enjoyment?
- Display Performance: Is your screen capable of handling HDR effectively?
The Step-by-Step Guide to Turning Off HDR on Various Devices
If you’re looking to switch off HDR on your device, you’re not alone. Sometimes, those vibrant colors that HDR brings can be a little too much, right? Whether you’re watching at home on a smart TV or catching up on your phone, it’s super simple to dial it back. Here’s how you can do it across different devices:
- Smart TVs: Head to your settings, navigate to the Picture menu, and look for the HDR settings. Turn it off, and enjoy the more relaxed color palette.
- Streaming Devices: For Roku or Amazon Fire, browse to the display settings and toggle the HDR option off.
- Game Consoles: On Xbox or PlayStation, dive into the system settings, find display options, and simply switch off HDR.
- Mobile Devices: For iPhone or Android, go into the display settings and look for HDR streaming options; it’s just a tap away!
Still confused? No worries! Sometimes it helps to visualize the steps. Here’s a quick comparison of how to find HDR settings based on your device:
| Device | Location of HDR Setting |
|---|---|
| Smart TV | Settings > Picture > HDR |
| Roku | Settings > Display > HDR |
| Xbox | Settings > General > Display |
| iPhone | Settings > Video > HDR |
Tips and Tricks for Optimizing Your YouTube Settings
Getting your YouTube experience just right can feel a bit like tuning a radio—you want the clearest sound and sharpest picture without all those annoying static! When it comes to optimizing your video settings, especially if you’re looking to switch off HDR (High Dynamic Range), there are a few steps that can really make a difference. Start by diving into your settings menu; it’s not as intimidating as it sounds! Here’s what you should check:
- Check Your Playback Settings: Navigate to the “Quality” settings while watching any video and choose the resolution that suits your device, usually 1080p or lower to avoid HDR if your screen doesn’t support it.
- Device Compatibility: Ensure that your device’s screen can handle HDR. If not, it’s best to keep HDR switched off for a smoother experience.
- Clear Cache: Sometimes, the settings can get stuck. Clearing your app’s cache will refresh it and help set your preferences straight.
Now, don’t forget to explore your account settings, too! YouTube has options tailored for various devices; whether you’re watching on a phone, tablet, or smart TV, these tweaks will optimize your experience. Here’s a quick look at what to adjust:
| Device Type | Best Resolution | HDR Status |
|---|---|---|
| Mobile | 720p/1080p | Off |
| Tablet | 1080p | Off if unsupported |
| Smart TV | 4K | On if supported |
By following these tips, you can easily optimize your YouTube settings, ensuring you enjoy your favorite videos at the best quality for your device! Who knew tuning up your video experience could be this straightforward?
Exploring Alternatives: When and Why to Keep HDR Activated
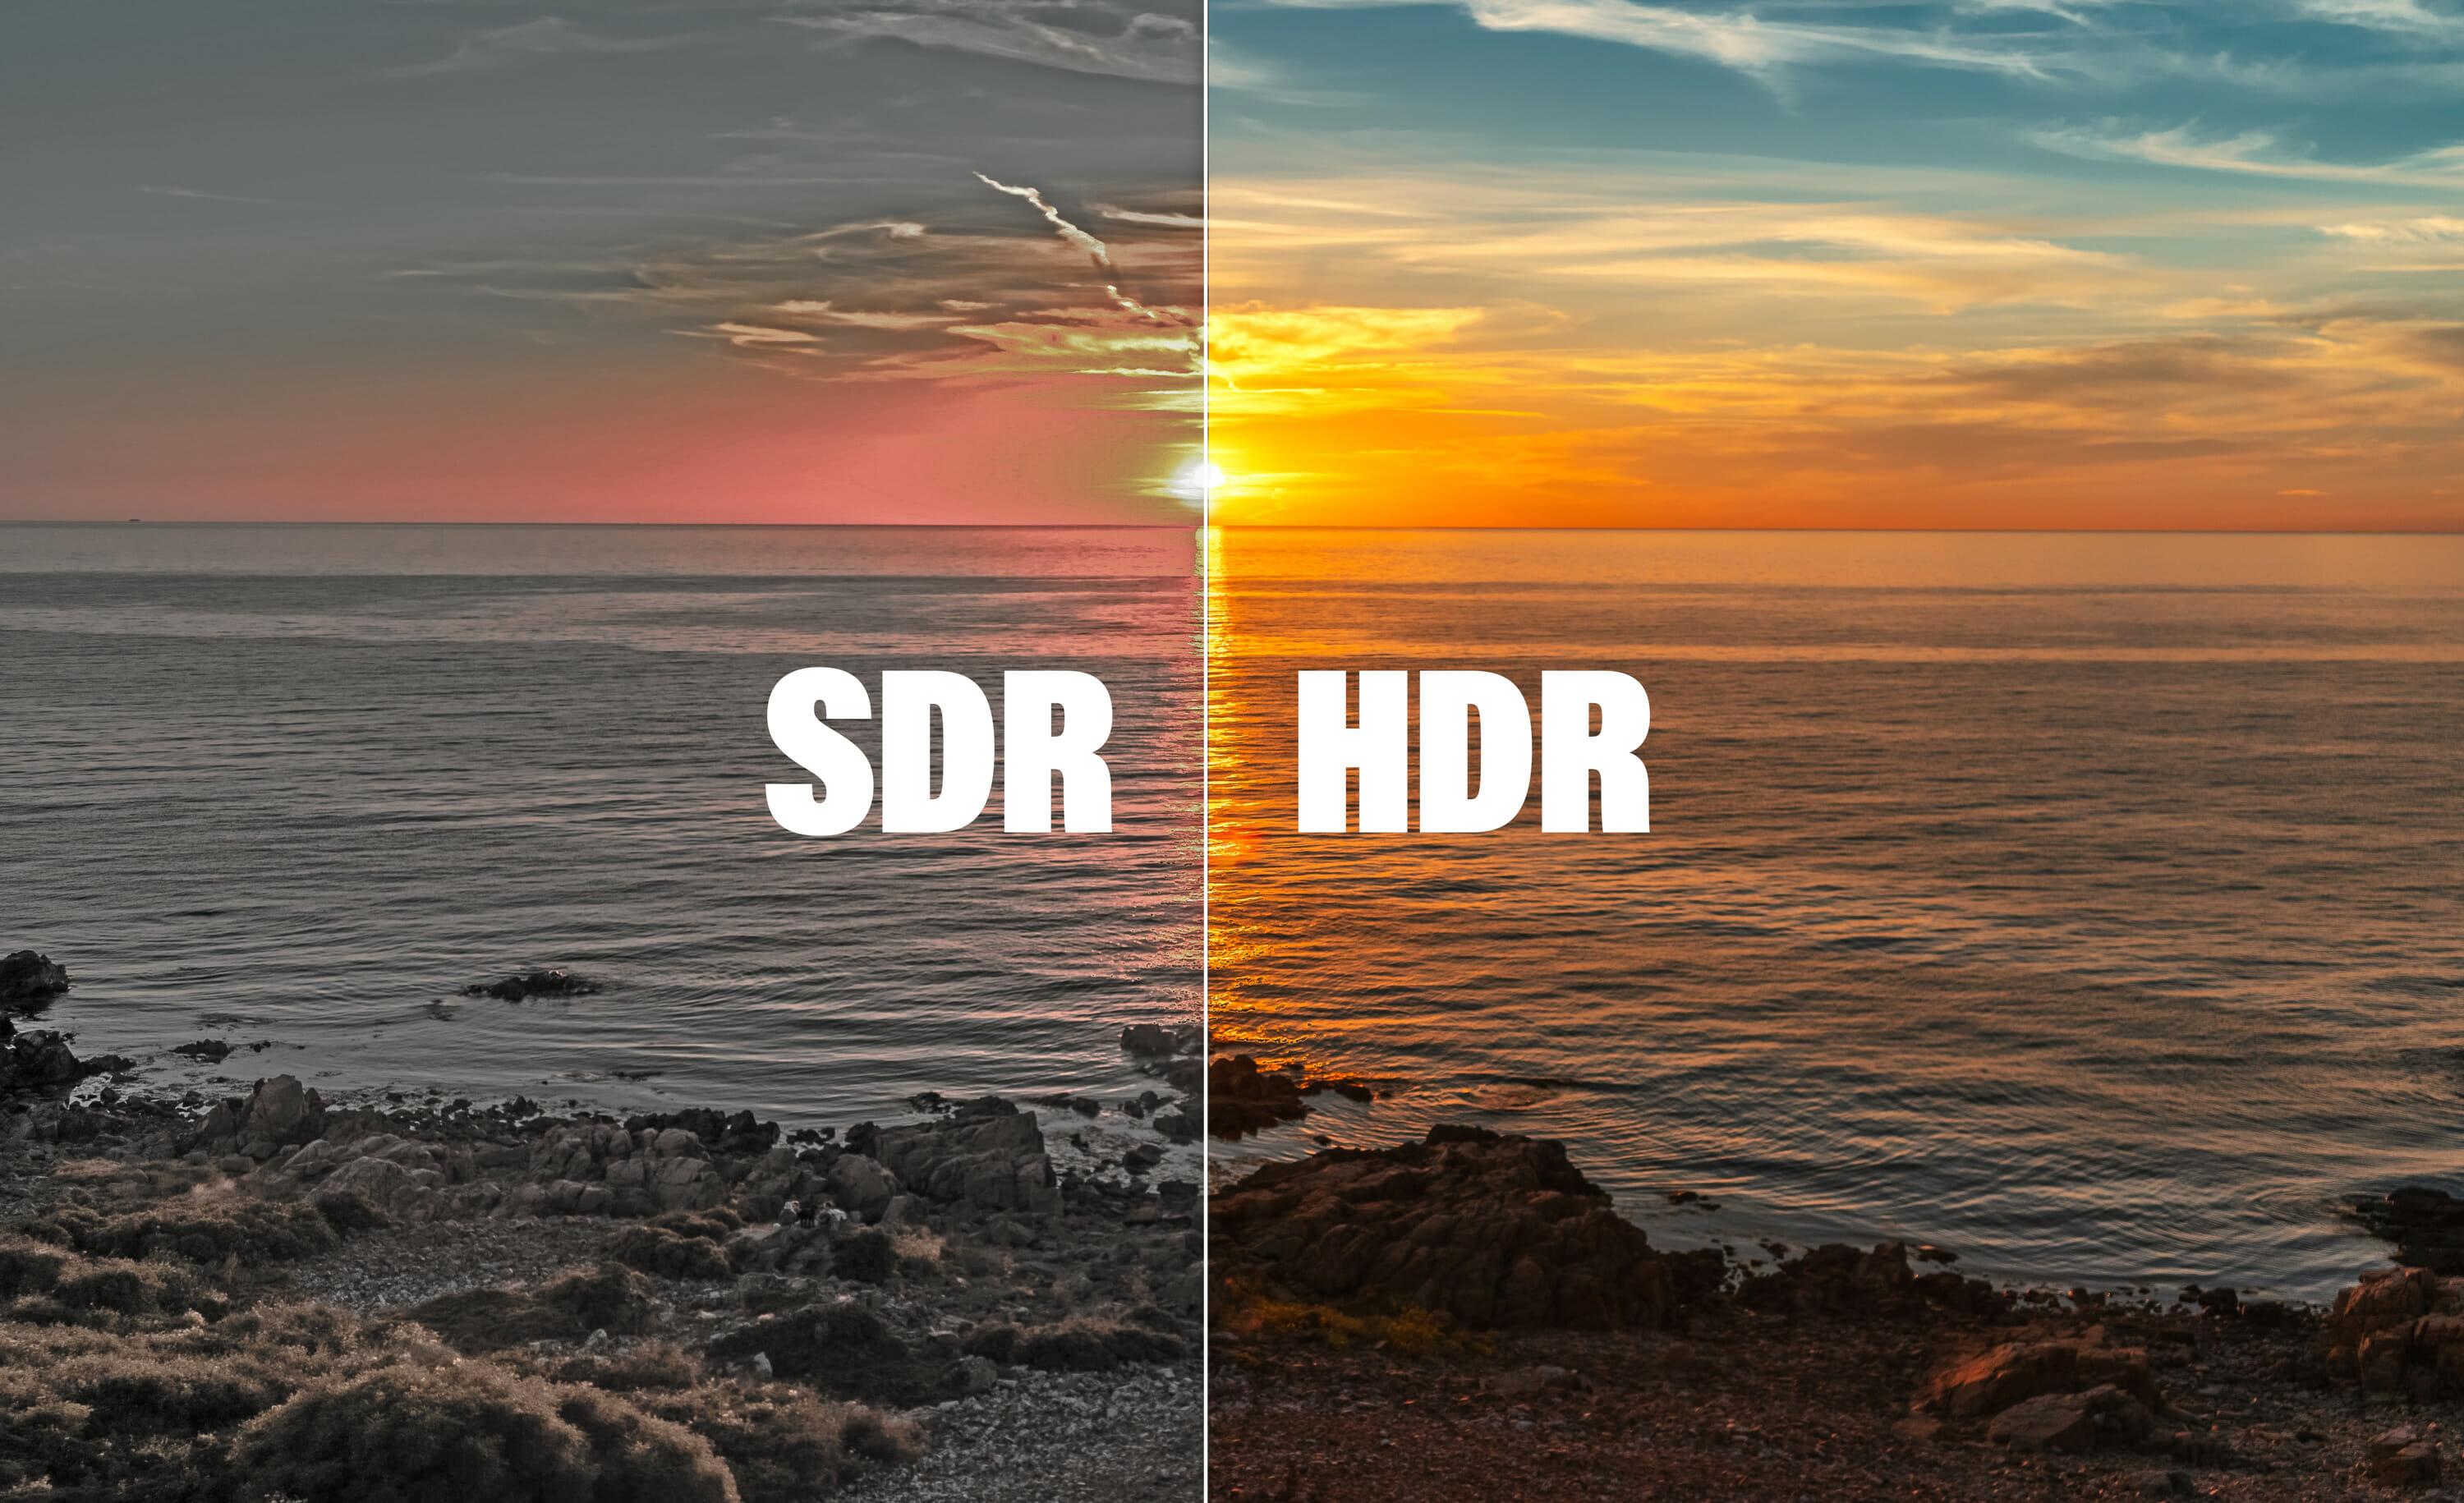
When diving into the world of HDR (High Dynamic Range) video, it’s essential to understand when keeping it activated can elevate your viewing experience. Picture this: you’re watching a thrilling movie with dramatic lighting and vibrant colors. HDR enhances those visuals, making dark scenes richer and bright elements pop like fireworks. Keeping HDR on is especially beneficial for content that is crafted to take advantage of this technology. Think blockbuster films, nature documentaries, or any flick with artistic cinematography that aims to immerse you in an almost lifelike rendering of colors and contrast. This can definitely transport you from your couch to a fantastical realm, wrapping you up in a visual feast that traditional SDR (Standard Dynamic Range) simply can’t match.
However, there are times when HDR might not be your best friend. Imagine things appearing washed out or colors looking a bit exaggerated—definitely not the effect you’re aiming for, right? Assess your devices and content source: some older TVs might struggle with HDR or, worse, render it poorly, leading to a subpar experience. Also, watch out for content that isn’t optimized for HDR, like certain YouTube videos or older films. In these cases, flipping HDR off can lead to a clearer, more true-to-life depiction of the original content. So, whether you’re looking to immerse or enjoy simplicity, it’s all about finding that sweet spot for your viewing pleasure. Embrace the mastery of toggling between these modes—a pro move that keeps your watching experience on point!
Closing Remarks
And there you have it—your comprehensive guide to switching off HDR on YouTube like an absolute pro! 🎉 Now you can kick back and enjoy your videos the way you prefer, without those vibrant hues and over-saturated scenes messing with your viewing experience.
Remember, mastering YouTube is all about finding what works best for you. Whether you’re a casual viewer or a budding content creator, finding the right settings can make all the difference. Don’t hesitate to experiment with different features and settings until you discover that perfect vibe for your channel or binge-watching session.
If you’ve found this guide helpful, why not share it with friends or fellow creators? They might just thank you for sparing them from the headache that HDR can sometimes bring. And hey, if you have any tips or tricks of your own about mastering YouTube, drop a comment below! We’re all in this together, learning as we go. Until next time, keep those screens lit and your creativity flowing! 🚀✨

