Hey there! Ever found yourself watching a YouTube video so good that you just wish you could hit pause on life and freeze that moment forever? Well, you’re in luck! In today’s digital age, capturing those unforgettable snippets isn’t just for pros anymore. Whether it’s a mind-blowing tutorial, a hilarious clip, or that heartwarming scene from your favorite vlog, screen recording offers a fabulous way to save those moments right on your laptop.
In this article, we’re diving into the easy-peasy world of screen recording YouTube videos. Trust me, it’s simpler than you think! So grab your laptop, kick back, and get ready to unlock the secrets to reliving those epic moments anytime you want. Let’s get started!
Understanding the Basics of Screen Recording on Your Laptop
Screen recording on your laptop is a fantastic way to capture those moments that matter, whether it’s a favorite YouTube tutorial or one of those heartwarming music videos you just can’t get enough of. Getting started is often simpler than you might think! Most laptops come with built-in software that allows you to hit record with just a few clicks. It’s like having your own personal filmmaker at your fingertips! Typically, all you need to do is decide what you want to record, find the right tool, and, voila, you could be on your way to producing YouTube gold!
Here’s a quick rundown to get you started with screen recording:
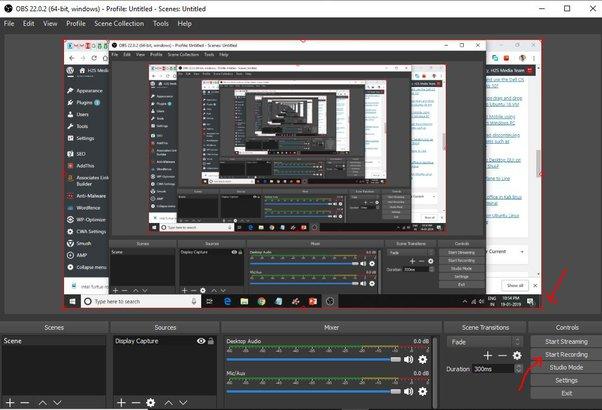
- Choose Your Software: Look for options like OBS Studio, Camtasia, or the built-in tools like Xbox Game Bar for Windows or QuickTime for Macs. Each has unique features!
- Set Up Your Screen: Make sure you have everything organized on your screen. Close tabs, silence notifications, and have the YouTube video ready to go.
- Adjust Settings: Tweak settings like resolution and audio input to ensure you capture everything in clear quality.
- Hit Record: Simply press the record button and start playing your video. Just remember, timing is everything!
Choosing the Right Screen Recording Software for You
When it comes to choosing the right screen recording software, it’s essential to consider what you actually need. Are you looking for something super simple to capture quick clips, or do you need advanced features like editing tools and annotations? Here’s a quick checklist to help you decide:
- User-Friendliness: Can you navigate the software easily? A complicated interface can lead to frustration.
- Output Quality: Does it capture in high-definition, especially for YouTube videos?
- Editing Features: Will you want to trim or annotate your recordings later? Look for software that offers built-in editing tools.
- File Formats: Ensure it supports the file types you need, especially if you plan to share or upload your recordings.
- Price: Consider whether you want a free option or are willing to invest in premium features.
Different options cater to various users. For instance, OBS Studio is a favorite among streamers for its flexibility, while CamStudio appeals to those on a budget. If you’re in a hurry, tools like Screencast-O-Matic provide a quick solution and easy sharing options. Here’s a comparison table to sum up a few popular choices:
| Software | User-Friendly | Free Version | Advanced Features |
|---|---|---|---|
| OBS Studio | No | Yes | Yes |
| Screencast-O-Matic | Yes | Yes | Limited |
| Filmora | Yes | No | Yes |
| CamStudio | Average | Yes | No |
Mastering the Art of Capturing YouTube Videos Seamlessly
Screen recording YouTube videos on your laptop can feel like a daunting task, but with the right tools and a bit of know-how, it’s easier than you might think. Whether you’re looking to save that hilarious clip for later, create a tutorial, or simply share your favorite moments with friends, the process can be seamless. Start by choosing a screen recording software that suits your needs. Here’s a quick rundown of popular options:
- OBS Studio: Free and open-source, perfect for high-quality recordings.
- Camtasia: A paid option that offers extensive editing tools along with recording features.
- Bandicam: Known for its intuitive interface and high compression ratio.
Once you’ve selected your software, configuring your settings is key. Make sure to adjust the recording area to fit the YouTube video perfectly. It’s like setting the stage before the show—get it right, and you can capture the magic without any distractions. You might want to check the audio settings too; nothing ruins a spectacular moment like poor sound quality! Remember, the goal is to preserve the essence of the video. Here’s a simple checklist to keep everything in line while you record:
- Test your microphone if you plan on adding commentary.
- Disable any notifications to avoid interruptions.
- Double-check your storage space to avoid a recording cutoff.

Tips and Tricks to Enhance Your Screen Recording Experience
To truly elevate your screen recording game, prep your setup before hitting that record button. First and foremost, make sure your laptop is clean—not just the screen, but the desktop too! A clutter-free environment does wonders for your focus and can help you avoid distractions. Next, consider using a high-quality microphone; trust me, poor audio can spoil the most visually stunning video. If you’re recording a tutorial, this is key! Also, don’t forget to adjust your screen resolution for optimum clarity. It’s like choosing the right canvas for a masterpiece—higher resolution gives you sharp, clear visuals that make everything pop.
Now, let’s talk about the magic of editing your recordings. Utilizing basic video editing software can significantly enhance your final product. Trim any unnecessary pauses or mistakes—nobody wants to watch someone fumble around! Think of it as polishing a gemstone until it shines. You might also consider adding annotations or callouts to highlight important points, making it easier for your viewers to follow along. If you’re looking to boost engagement, you could even throw in some playful background music or sound effects. Remember, the goal is to create a captivating experience for your audience; little touches can make a massive difference!
To Conclude
And there you have it—your ultimate guide to screen recording YouTube on your laptop, wrapped up like a present under the tree! 🎁 Whether you’re looking to save those epic game highlights, capture insightful tutorials, or relive unforgettable moments, these easy methods make it a breeze.
Just think of it as setting up your personal cinema at home, where you can watch and rewatch your favorite videos, share hilarious clips with friends, or even document your learning process. Who knew technology could be this fun and accessible?
So, the next time you come across a video that’s simply too good to let slip away, don’t hesitate! Dive in, whip out those recording tools, and capture the moment. You’ve got this!
Thanks for stopping by and happy recording! If you’ve got any questions or tips of your own, feel free to drop them in the comments. Until next time, keep those creative juices flowing! 🌟