


Introduction: How to Upload a YouTube Video for Beginners in 2025
Hey there, aspiring YouTube stars! Are you ready to dive into the exciting world of video content creation but find yourself scratching your head at the thought of uploading your first video? Well, you’re in luck! In 2025, navigating the maze of YouTube’s upload process has never been easier, and we’re here to break it down step-by-step. Think of this as your trusty map guiding you through a vast jungle of screens, settings, and best practices that will not only simplify your upload experience but also help your videos shine like the diamonds they are. Imagine your content getting the love it deserves instead of getting lost in the endless sea of videos.
From dragging and dropping files to selecting visibility settings that keep your masterpiece under wraps until it’s ready for the spotlight, we’re covering it all. Plus, with a sprinkle of tips on crafting irresistible titles and thumbnails, you’ll have viewers clicking in no time. And let’s not forget the essential legal bits, like that “made for kids” checkbox—because trust me, you don’t want to navigate those waters unprepared!
So, grab your camera, hit record, and let’s get started on your journey to becoming a YouTube sensation in 2025. Are you ready? Let’s jump right into the upload workflow and set you up for success!


Understanding the YouTube Video Upload Workflow for 2025
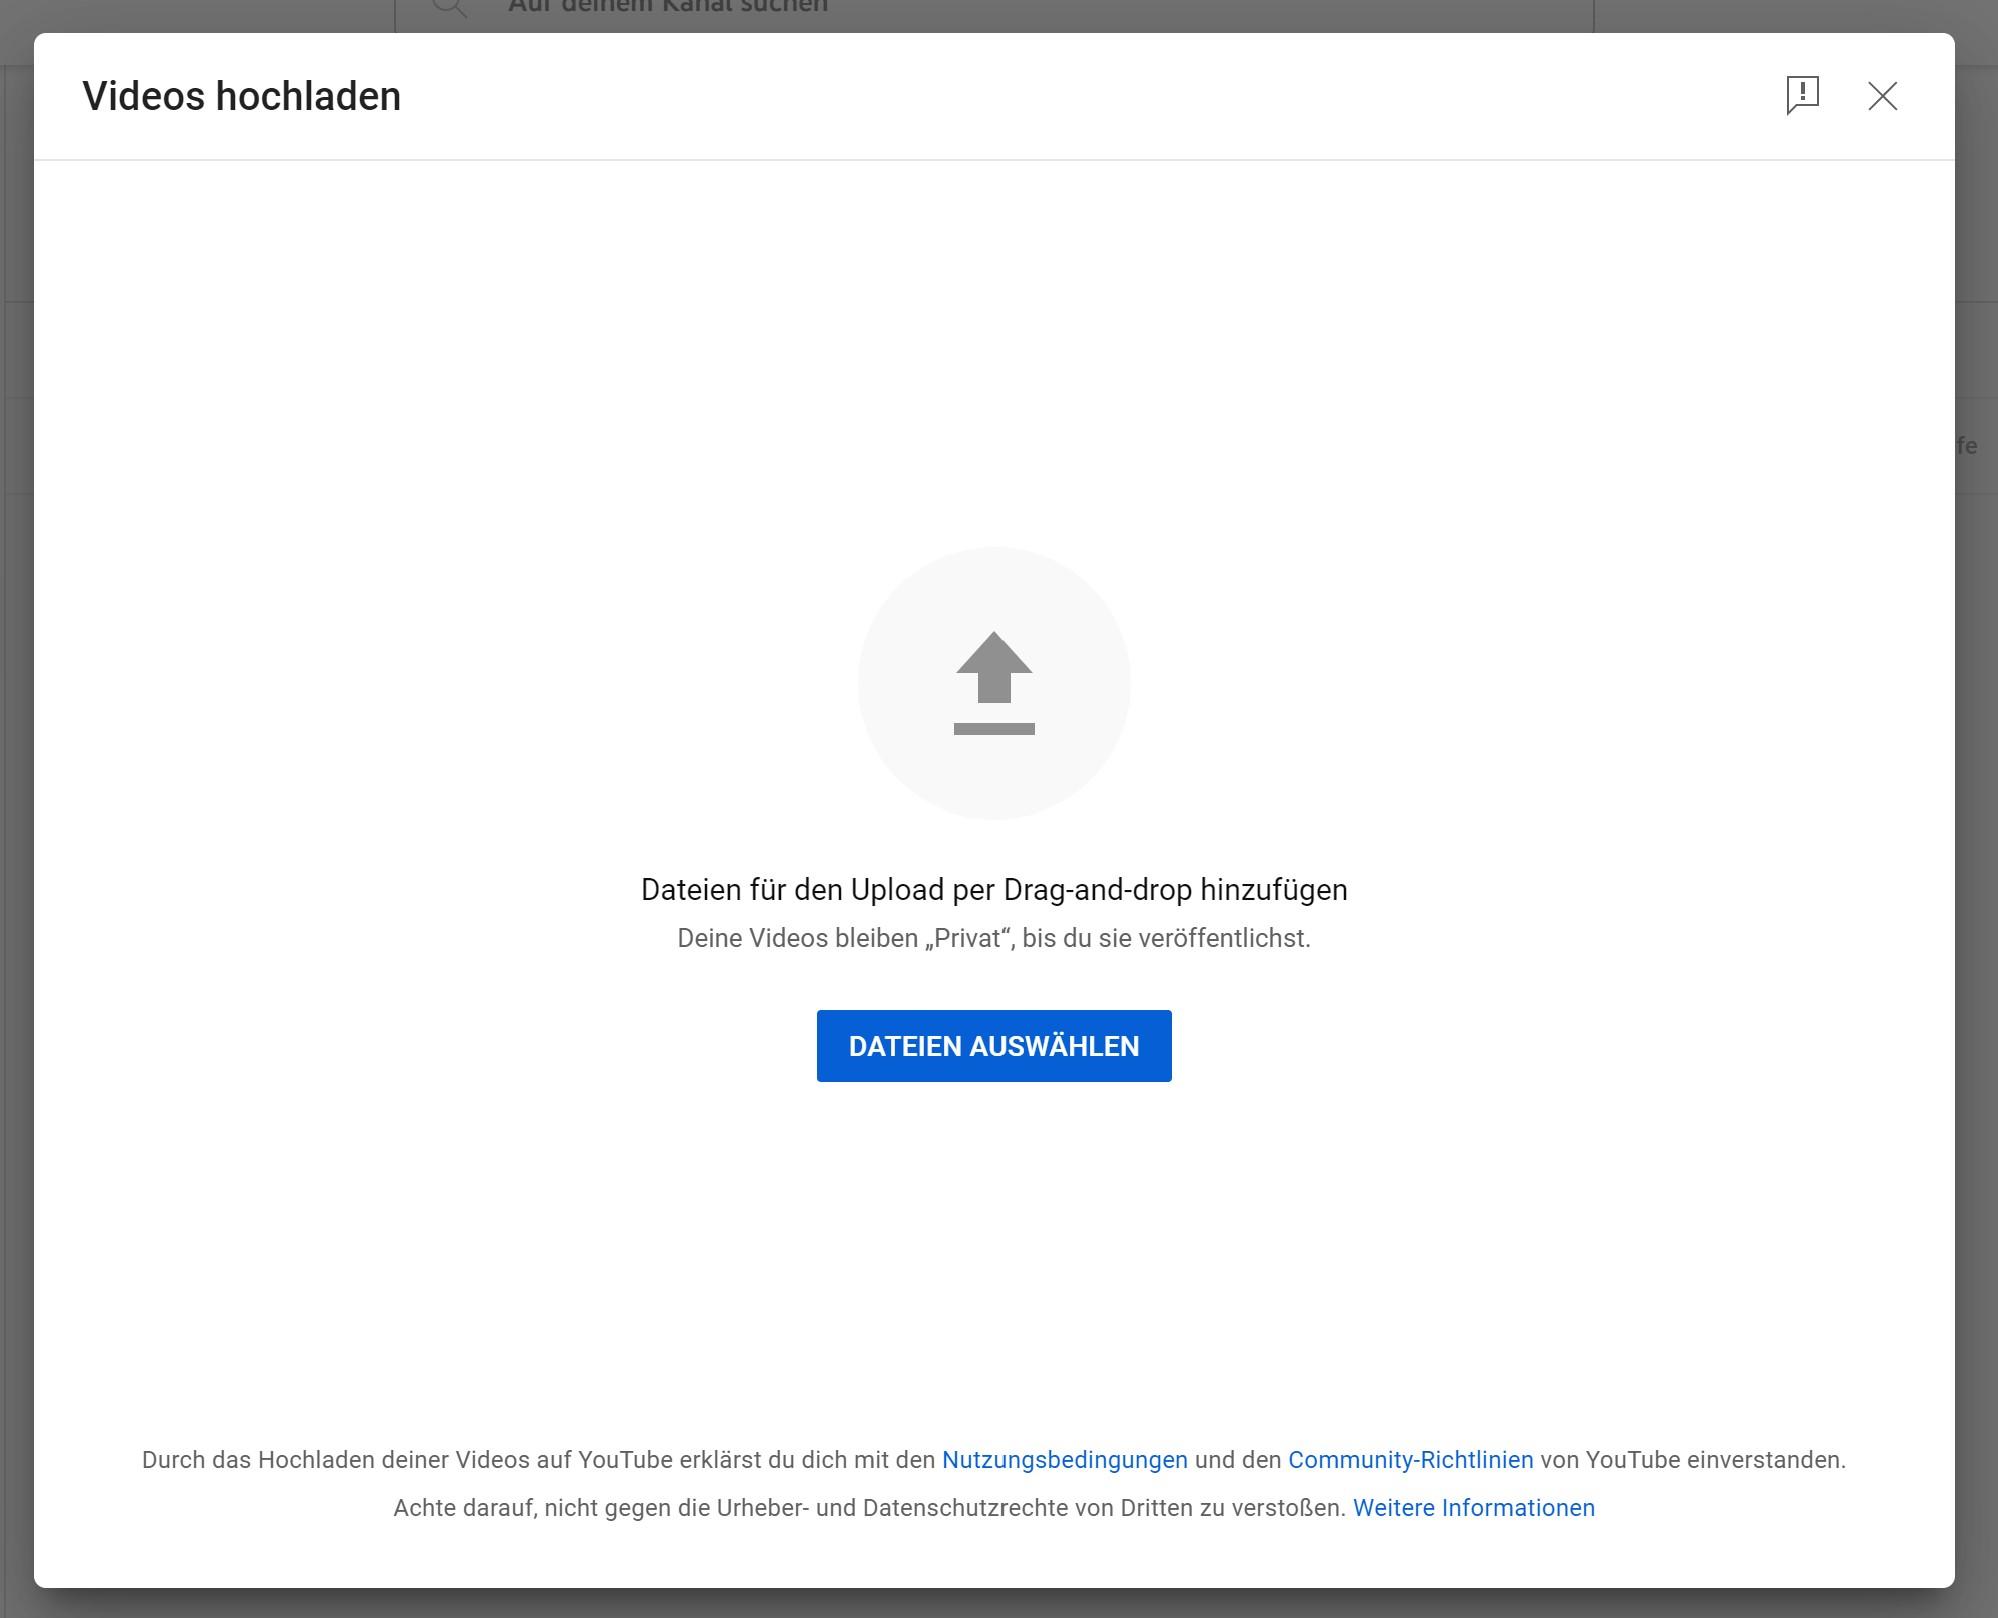
When you’re ready to upload your masterpiece to YouTube, the first thing to know is that the workflow is designed to guide you smoothly through the process. You can either drag and drop your video file right into the upload box or click to select it from your device. Once you’ve got your video loaded, you’ll find that the platform breaks the upload process into several key stages. Before you rush ahead with making your content public, it’s wise to first set the visibility to either Private or Unlisted. This way, you avoid putting unnecessary pressure on yourself to have the video instantly ready to go while it processes for high quality or checks for copyright issues. Think of this step like letting a fine wine breathe before serving; it needs that time to really hit its full potential!
After you’ve secured the privacy settings, it’s time to tackle another critical aspect—the “Made for Kids” designation. This choice isn’t just a checkbox; it’s a legal requirement, and mislabeling can lead to some serious consequences. If your content is geared solely towards kids, then mark it as such. However, if it’s family-friendly or targets a wider audience, you can select “not made for kids.” Remember, that includes content which may captivate both adults and children alike, think of franchises like Marvel or Star Wars. Plus, you can streamline future uploads by setting these preferences in your YouTube Studio settings—a little prep work here makes for smoother sailing the next time around!

Mastering Essential Settings Before You Go Live
Before you take that leap and hit the “go live” button, there are a few crucial settings you absolutely need to master. First off, let’s chat about the visibility option. You might be tempted to set your video to public right away, but pump the brakes on that! Like waiting for a fine wine to breathe, give your video some time to process fully—this means waiting a bit after uploading before it’s accessible to everyone. It’s all about quality; trust me, you don’t want to launch a video that’s stuck processing or, worse, subject to copyright claims. Keeping it private or unlisted allows you to check everything without the pressure of an audience breathing down your neck. Once you’ve uploaded, let it marinate for at least a couple of hours so that it can clear all the necessary checks. Patience really pays off here!
Now, let’s dive into the “Made for Kids” setting. This isn’t just any checkbox; it’s a legal requirement! Getting this wrong could land you in some serious trouble, so take your time to consider your content. If your video is primarily aimed at kiddos, you have to tick that box—think along the lines of Baby Shark or Peppa Pig. But if your video is meant to entertain a broader audience, like Marvel or Star Wars, then it’s not just for kids. Being honest here is essential. To make your life easier later, check out the YouTube Studio settings where you can set defaults for these essentials. That way, they’ll be automatically applied whenever you upload new videos! It’s all about making the uploading process smoother, so you can focus on what really matters—creating awesome content!

Crafting Irresistible Titles and Thumbnails for Maximum Clicks
When it comes to crafting titles and thumbnails, simplicity and clarity are your best friends. Imagine someone scrolling through YouTube; if your title doesn’t pop out like a neon sign, they’ll keep scrolling. So think about what your video offers. Are you answering a burning question? Then your title should scream that, like “How to Ace Your First Job Interview: Tips & Tricks!” On the flip side, if your video is more about fun than facts, nudge curiosity with titles that provoke thought and wonder. Give your viewers a reason to stop and think, maybe something like “You Won’t Believe What Happens When You Try This! 😲”
Now let’s talk thumbnails, the visual bait to your content hook. First impressions really do matter! Thumbnails need to grab attention without being overwhelming. Stick to a max of four elements: bold text, a captivating face, and a background that doesn’t distract. Aim for powerful visuals that create intrigue. For instance, instead of a cluttered collage, a clean, striking image paired with a simple, readable font can do wonders. And remember, what looks amazing on your design canvas might become a blurry mess on a mobile screen. Test different versions too! Use A/B testing to see what resonates best with your audience, because the better your title and thumbnail, the more likely that viewer is to dive into your content.

Maximizing Viewer Engagement with Effective End Screens and Monetization Tips
When it comes to keeping your audience glued to your content, don’t underestimate the power of end screens. These handy tools are your last chance to engage your viewers before they click away. Think of them as a party favor at the end of a fantastic party—you want your guests to leave with a smile and a reason to stick around. By presenting a compelling option for viewers to watch another video, or a playlist that relates to your latest content, you boost the chances of keeping that connection alive. A direct call to action in your outro can be the difference between a viewer fading into the abyss of YouTube and one that eagerly anticipates your next upload. Make it easy for them; simply say, “Check out this video next!” and watch those views stack up.
Now, let’s talk about monetization—a vital aspect that many creators don’t fully take advantage of. If you’re lucky enough to be monetized, you should definitely think strategically about when and how to enable ads. Most of the time, turning on ads is a no-brainer, but there are moments when it’s wise to reconsider. For example, if you’re uploading sensitive content or seeking to foster goodwill with a charity video, turning ads off can showcase your intent and help build trust with your audience. Additionally, if your video is longer than 8 minutes, manually adding mid-roll ads can optimize your revenue without overwhelming your viewers. Just remember, the goal is to balance viewer enjoyment and monetization. Keep your audience in mind, and allow your creativity to shine through without compromising their experience!
Closing Remarks
And there you have it, folks! You’ve just taken a deep dive into the ins and outs of uploading your very first YouTube video in 2025. Wasn’t that a ride? From navigating the upload workflow like a pro to doling out essential tips on visibility settings and making those all-important thumbnails pop, we’ve covered tons of ground together! 🎥✨
Remember, the world of YouTube can seem overwhelming at first, but by arming yourself with these beginner-friendly strategies, you’re turning that initial frustration into the fuel that will help you succeed. It’s kind of like learning to ride a bike; you may wobble at first, but with practice, you’re soon cruising down the road, enjoying the ride! 🚴♂️
As you embark on this content creation journey, keep in mind that every great YouTube channel started with a single upload. So, don’t hesitate! Grab your video files, set your visibility options, and take the plunge. The only way forward is by hitting that “publish” button. If something doesn’t feel right, remember—there’s always room for adjustment once you get your video live, and every experience teaches you something valuable.
We’d love to hear from you! Have any questions after watching that video? Maybe you have some beginner tips of your own? Drop them in the comments, and let’s keep the conversation going! And if you found this blog post and the video helpful, why not share them with a friend who’s also looking to start their YouTube journey? Sharing is caring, after all!
Here’s to your future successes and the exciting adventures that await you on YouTube! Happy uploading! 🚀

